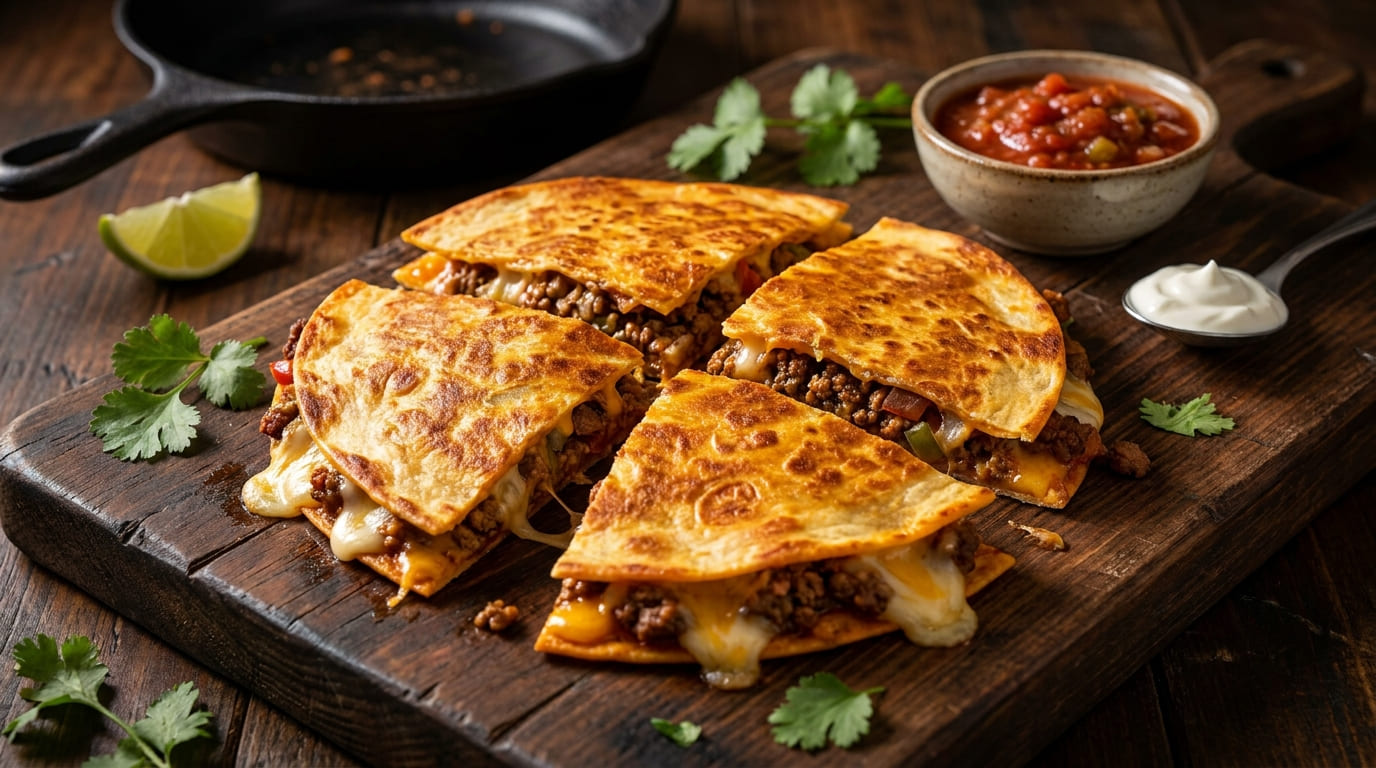
The quesadilla is one of the most efficient meals in home cooking. Two layers of tortilla, a filling, a hot pan — and in under five minutes per piece you have something crispy, cheesy, and deeply satisfying. This ground beef quesadilla recipe takes that simplicity and makes it work with just five ingredients, which puts it firmly in the same category as the Mexican-inspired weeknight cooking that home cooks return to most reliably — fast, bold-flavored, and built from things that are already in the pantry.
The five ingredients here are ground beef, flour tortillas, shredded cheese, taco seasoning, and salsa. Everything else — the olive oil to cook the beef, the butter to crisp the quesadilla, the salt and pepper — is a pantry basic that doesn’t count toward the ingredient total. This is the same convention used by Taste of Home, Food Network, and every major food publication that publishes 5-ingredient recipes. The point of the constraint is not to make cooking harder — it’s to make weeknight cooking more achievable by proving that you already have most of what you need.
This is the second recipe in the 5-ingredient series on this site. The previous entry the honey garlic 5-ingredient chicken dinner follows a similar pantry-first logic with completely different flavors. Together they make a good case for why this approach to weeknight cooking is worth adopting: you’re not just learning one recipe, you’re internalizing a methodology. Once you understand how to build maximum flavor from minimal ingredients, the specific recipe becomes almost secondary.
Ground beef is the ideal protein for this dish. It browns quickly, absorbs seasoning rapidly, and has enough fat content to stay moist and flavorful after cooking without any additional sauce or liquid. The taco seasoning does the heavy lifting on flavor — cumin, chili powder, garlic powder, onion powder, and oregano in a pre-balanced blend that you would otherwise have to measure individually. And for quality that makes a perceptible difference in a simple filling like this, ButcherBox grass-fed ground beef has a cleaner, more mineral beef flavor that comes through even after seasoning — particularly when the quesadilla is eaten hot with nothing more than a spoonful of salsa on the side.
“A great quesadilla is a study in controlled restraint. The filling should be seasoned but not overseasoned. The cheese should melt completely but not overflow. The tortilla should be golden but never burned. Every one of those things is achievable in 20 minutes.”
From a nutritional standpoint, each quesadilla in this recipe provides approximately 37 grams of protein — a substantial amount from a single meal. According to USDA FoodData Central, cooked 80/20 ground beef provides around 24 grams of protein per 100 grams, making it one of the most cost-efficient protein sources available. Combined with the cheese — which adds both additional protein and calcium — this is a filling, nutritionally complete meal that happens to take less than 25 minutes to prepare.
The technique that most separates a good quesadilla from a great one is the cheese layering. Every reliable source that has tested this agrees: cheese goes on the tortilla first (directly on the bread), then the beef, then another layer of cheese on top of the beef. This double-cheese method serves a functional purpose — the cheese on both sides of the beef melts and creates a structural bond that holds the filling in place when you cut and eat the quesadilla. A single cheese layer on one side produces a quesadilla where the beef slides out the moment you take a bite. Two cheese layers produces one that holds together cleanly through to the last wedge.
Chef’s Note: Drain the Beef Before Seasoning — Sequence Matters
After the ground beef is fully browned and cooked through (no pink remaining, minimum 71°C / 160°F internal temperature), drain the excess grease from the pan before adding the taco seasoning and salsa. This step matters for two reasons. First, excess grease in the filling makes the quesadilla oily — it pools on the tortilla and prevents the underside from crisping properly. Second, by draining before seasoning, you keep all the taco seasoning in the pan with the beef rather than losing it with the drained fat. Add the salsa after the seasoning and stir it in — the liquid in the salsa moistens the filling and keeps it from drying out, replacing the fat you just removed with flavor instead.
Chef’s Note: Medium Heat Only for the Quesadilla Pan
The quesadilla pan needs to be at medium heat — not medium-high, not high. At medium heat, the tortilla takes 3–4 minutes to reach a deep golden-brown, which is exactly the time needed for the cheese inside to fully melt. At high heat, the tortilla browns in under 2 minutes — before the cheese has had time to soften — and you end up with a burnt exterior and solid, unmelted cheese inside. The cast iron skillet is ideal for this step because its heat retention allows you to maintain a consistent medium temperature without hot spots. If you’re using a lighter pan, watch carefully and reduce the heat if the tortilla starts coloring too quickly in the first minute.
How to Make It
01
Brown and Season the Ground Beef
Heat olive oil in a cast iron skillet or large non-stick pan over medium-high heat. Add the ground beef in one flat layer. Let it sit undisturbed for 2 minutes — you want a brown crust to develop on the bottom before breaking it up. This initial sear builds flavor depth that constant stirring prevents. After 2 minutes, break the beef into small, even pieces with a wooden spoon or meat chopper and continue cooking for another 3–5 minutes until fully browned with no pink remaining. The internal temperature of the beef must reach 71°C (160°F) — USDA minimum for ground meat safety.
Drain the excess grease from the pan — see Chef's Note above. Return the pan to medium heat. Add the taco seasoning and stir to coat all the beef evenly. Cook for 60 seconds to bloom the spices in the residual heat. Stir in the salsa and cook for another 90 seconds until the liquid is mostly absorbed. The filling should look moist and saucy but not wet. Remove from heat and set aside.
02
Wipe the Pan and Set Up for Quesadillas
If using the same cast iron skillet, wipe it out with a folded paper towel (carefully — it's hot). Set the heat to medium and add ½ teaspoon of butter, swirling to coat the surface. If using a separate non-stick pan, heat it to medium and add butter. The butter adds flavor to the tortilla surface and promotes even browning. If you prefer a lighter result, cooking spray is an acceptable substitute.
03
Assemble the Quesadilla (Cheese-Beef-Cheese Method)
Place one flour tortilla flat in the warm buttered pan. Immediately sprinkle half the cheese for that quesadilla directly onto one half of the tortilla. Add one portion of the beef filling (about ½ cup per quesadilla) on top of the cheese. Sprinkle the remaining cheese for that quesadilla on top of the beef. The double-cheese layer is not optional if you want a quesadilla that holds together when cut — see the technique explanation in the Introduction above.
04
Cook the First Side
Fold the bare half of the tortilla over the filled half to form a half-moon shape. Using the flat back of a spatula, press down gently but firmly on the top of the quesadilla — this ensures even contact between the tortilla surfaces and speeds up the cheese melt. Cook undisturbed for 3–4 minutes at medium heat until the bottom tortilla is a deep, even golden-brown and the cheese inside has clearly begun to melt (you'll see it seeping slightly at the edges).
05
Flip and Finish
Using a wide spatula, flip the quesadilla carefully in one confident motion. Press down again gently. Cook for another 2–3 minutes until the second side matches the first — deep golden, slightly crispy at the edges. The cheese should be fully melted throughout. Transfer to a cutting board and let it rest for 60–90 seconds before cutting — this brief rest prevents the cheese from flowing out immediately when cut. Slice into 3 or 4 wedges with a sharp knife or pizza cutter. Repeat with remaining quesadillas.
06
Serve Immediately
These cheesy quesadillas are best eaten immediately — the tortilla softens as it sits and the steam from the hot filling will reduce the crispiness within a few minutes of plating. If making multiple batches, keep finished quesadillas warm in a 95°C (200°F) oven on a wire rack set over a baking sheet — this keeps them warm without trapping steam that would soften the tortilla. Serve with salsa, sour cream, guacamole, and fresh lime.
Recipe Notes
This beef quesadilla recipe is one of several on this site built around ground beef as the primary protein. If you love the versatility and affordability of ground beef in weeknight cooking, the ground beef pasta skillet is another excellent one-pan option that follows a completely different flavor direction — Italian-seasoned beef with pasta and mozzarella, equally fast and budget-friendly.
Cheese selection: Any good melting cheese works in this recipe, but the choice matters for flavor. Pre-shredded Mexican blend (cheddar, Monterey Jack, and asadero) is the easiest option and melts reliably. Freshly shredded sharp cheddar has a stronger, more pronounced flavor. Monterey Jack alone is the mildest and creamiest option. Queso Oaxacan (if available) is the most authentically Mexican choice and has extraordinary stretch when melted. Avoid queso fresco — it doesn’t melt properly and stays crumbly inside a hot quesadilla.
Taco seasoning: Store-bought taco seasoning packets (Old El Paso, McCormick) are the most convenient option and are what this recipe is calibrated around. For a from-scratch blend that avoids the added sodium of packaged seasoning: combine 1 tsp cumin, ½ tsp chili powder, ¼ tsp garlic powder, ¼ tsp onion powder, ¼ tsp smoked paprika, and ⅛ tsp oregano. This produces approximately ¾ teaspoon of seasoning — the right amount for one serving of beef.
Air fryer method: For a hands-off batch cooking approach, assembled quesadillas can be air-fried at 190°C (375°F) for 4–5 minutes, flipped, then 3 more minutes until golden. The air fryer produces slightly less even browning than a cast iron skillet but requires no monitoring. If you’re already using your air fryer for other parts of the meal — for example, the crispy air fryer chicken thighs from our air fryer collection — the quesadillas can run as a second batch with minimal wait time.
Make it ahead: The beef filling keeps in an airtight container in the refrigerator for up to 4 days, making this recipe excellent for meal prep. Assemble and cook the quesadillas fresh each time — assembled but uncooked quesadillas stored in the fridge become soggy as the filling moisture penetrates the tortilla. Stored filling + fresh tortillas + 5 minutes in the skillet = a weeknight dinner that feels effortless even on the busiest evenings.
“The genius of the quesadilla is that it makes a modest filling — beef, cheese, seasoning — feel substantial and satisfying in a way that eating those same ingredients separately never would. The crispy tortilla is the delivery system, and it changes everything.”
For more weeknight dinners built around this protein, browse all the ground beef dinner ideas on this site — from skillet pasta to stuffed peppers to burger bowls. Ground beef is one of the most versatile and budget-conscious proteins in home cooking, and the collection reflects that range fully.
And if the 5-ingredient format is working well for your schedule, the full Quick & Easy collection is organized by time, method, and ingredient count — making it easy to find the right recipe for whatever kind of evening you’re having.
Nutrition Profile
(Per Serving)
Frequently Asked Questions
What are the 5 ingredients in this quesadilla recipe?
The 5 counted ingredients are: ground beef, taco seasoning, salsa, flour tortillas, and shredded cheese. Olive oil, butter, salt, and pepper are pantry basics not included in the ingredient count — a standard convention across food publishing.
What is the best cheese for beef quesadillas?
Any good melting cheese works. The best choices are: Mexican blend (cheddar + Monterey Jack + asadero) for the most complete flavor, sharp cheddar alone for a stronger taste, or Monterey Jack alone for the creamiest melt. Always shred from a block if possible — pre-shredded cheese contains anti-caking agents that can slow and uneven the melt. Avoid queso fresco, which doesn’t melt and stays crumbly.
Why use the cheese-beef-cheese layering method?
Two layers of cheese — one below the beef, one above it — act as a structural binder. The cheese melts and ‘glues’ the beef to both tortilla surfaces, preventing the filling from sliding out when you cut or eat the quesadilla. A single cheese layer on one side produces a quesadilla that falls apart. This double-layer technique is confirmed by multiple trusted recipe sources as the most reliable method.
How do I prevent a soggy quesadilla?
Three things cause soggy quesadillas: (1) too much liquid in the beef filling — drain the grease properly and make sure the salsa is mostly absorbed before assembling; (2) too much filling — overfilling prevents the tortilla from pressing flat against the heat, which slows crisping; (3) medium heat that’s too low — if the pan isn’t hot enough, the tortilla steams rather than crisps. Stay at medium, not medium-low.
Can I use corn tortillas instead of flour?
Yes, but flour tortillas are strongly recommended for this recipe. Flour tortillas are more pliable, fold without cracking, and create a sturdier quesadilla shell that holds the filling securely. Corn tortillas are more brittle and prone to cracking when folded, which causes the filling to spill out during cooking. If using corn tortillas, use two overlapping small ones (taco-sized) rather than folding a single one.
Can I make these quesadillas ahead of time?
The beef filling can be made up to 4 days ahead and stored in the fridge. Assemble and cook the quesadillas fresh each time — assembled but uncooked quesadillas go soggy as the filling moisture seeps into the tortilla. With prepared filling, the actual cook time is under 7 minutes per batch, making this a very fast weeknight assembly even on the most tired evenings.
What temperature does ground beef need to reach?
The USDA safe minimum for ground beef is 71°C (160°F) — higher than the 63°C required for whole muscle beef (steaks, roasts). Because ground beef is processed, any surface bacteria can be mixed throughout, requiring a higher minimum temperature to ensure safety. Use an instant-read thermometer in the thickest part of the beef mass while still in the pan to verify.
5-IngredientBeef QuesadillaBudget FriendlyCheese DinnerEasy MexicanFamily-FriendlyHigh ProteinPantry MealQuick Lunch